
Homemade Protein Treatment for 4C Hair: A Simple Guide
If your 4C hair feels weak, stretchy, or keeps breaking no matter how much you moisturize, protein is often the missing piece. This is one of the most talked-about topics in natural hair care right now, and for good reason. 4C hair has a tightly coiled structure with many bend points along each strand, which creates natural stress areas where breakage tends to happen first.
A homemade protein treatment for 4C hair can help reinforce those weak spots using simple ingredients from your kitchen. That said, protein is not automatically the answer for every hair problem. Some hair actually needs less protein, not more.
In this guide, you will learn what a protein treatment actually does, how to tell if your 4C hair needs one, a simple recipe you can make at home, how to apply it, and how often to repeat it without overdoing it.

What Is a Protein Treatment for 4C Hair?
Hair is built mostly from keratin, a structural protein that gives each strand its strength and shape. Over time, heat styling, coloring, chemical processing, and everyday manipulation can wear this protein structure down.
A protein treatment for 4C hair works by introducing hydrolyzed proteins, meaning proteins broken down into smaller molecules that can temporarily attach to weak or damaged areas along the hair shaft. This can help reinforce the cuticle and cortex, so strands feel stronger and more resilient for a period of time.
Chemically treated or high-porosity hair tends to respond more noticeably to protein, since these hair types often have more gaps along the strand for the protein to fill. This matters for many people with 4C hair, since the tight coil pattern and frequent bend points can naturally increase porosity in some areas.
It’s important to understand the difference between temporary strengthening and permanent repair. A homemade hair protein treatment does not undo existing damage. It temporarily improves how damaged hair looks, feels, and behaves until that portion of hair eventually grows out or is trimmed.
Does 4C Hair Need a Protein Treatment?
Not every head of 4C hair needs protein, and not at the same frequency. Here are practical signs that a protein treatment for natural hair may be worth trying:
- Excessive breakage, especially snapping rather than gradual shedding
- Hair that feels unusually weak or limp, even after moisturizing
- Excessive stretching when wet, with strands that feel gummy or lack bounce back
- Difficulty maintaining styles, where curls or twists fall quickly
- Recent heat, color, or chemical damage, including relaxers, bleach, or frequent flat ironing
On the other hand, protein may not be the right move if:
- Hair already feels hard, stiff, or straw-like
- Hair breaks easily but also feels dry and rigid, rather than soft and stretchy
- Several protein treatments have been done recently without much recovery time
- The main issue is dryness, not weakness, since dry hair often needs moisture first
Hair needs vary significantly from person to person, even within the same hair type. Before treating your entire head, it’s worth doing a small strand test on one section to see how your hair responds.
Homemade Protein Treatment Ingredients
Not every kitchen ingredient used in natural hair recipes is actually a strong protein source. Some contribute conditioning and slip rather than real strengthening. Here is an honest breakdown:
| Ingredient | Why People Use It | What It Contributes | Important Consideration |
|---|---|---|---|
| Egg | Contains natural protein | Mild strengthening, added shine | Must be rinsed with cool water to avoid cooking in hair; avoid if allergic |
| Greek yogurt / plain yogurt | Contains protein and lactic acid | Light strengthening, gentle exfoliation | Milder than egg, good for beginners |
| Gelatin | Made from hydrolyzed collagen protein | One of the more direct protein sources for DIY use | Needs to dissolve fully in warm water before use |
| Mayonnaise | Contains egg and oil | Mild protein plus conditioning | Can feel heavy on fine or low-porosity hair |
| Aloe vera | Popular in natural hair routines | Mainly conditioning and soothing, not a strong protein source | Best used to balance protein treatments, not as the main strengthening ingredient |
| Oils (such as coconut or olive oil) | Added for slip and manageability | Conditioning support, not protein | Optional addition, not a substitute for protein |
A common approach for beginners is to build a treatment around one real protein source, such as gelatin or egg, and use the other ingredients mainly to support texture and rinse-out ease.
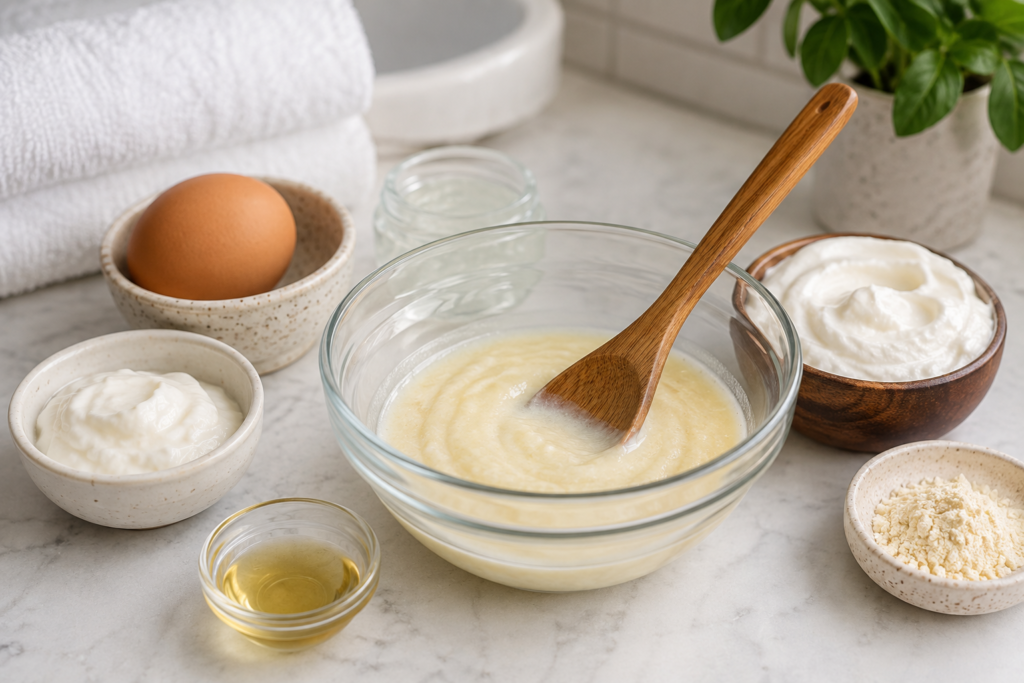
Best Simple Homemade Protein Treatment for 4C Hair
For beginners, a conservative approach with one clear protein source tends to work well. This gelatin-based recipe is a common starting point for a homemade hair protein treatment because gelatin is a reliable, direct protein source.
Ingredients (for medium-length hair):
- 1 tablespoon unflavored gelatin powder
- 1 cup warm water
- 1 tablespoon plain yogurt
- 1 teaspoon honey
Why each ingredient is included:
- Gelatin provides the main protein content
- Warm water helps the gelatin dissolve fully and evenly
- Yogurt adds mild conditioning to balance the protein
- Honey helps with slip and softness during application
Amounts by hair length:
- Short hair (TWA to chin length): use half the recipe
- Medium hair (shoulder length): use the full recipe above
- Long hair (past shoulders): use 1.5 times the recipe
Keep the recipe simple rather than adding extra ingredients. More ingredients does not mean a stronger or more effective treatment, and it can make the mixture harder to rinse out fully.
How to Make the Protein Treatment
- Prepare your ingredients and have everything measured before you start.
- Dissolve the gelatin fully in warm water, stirring until no clumps remain.
- Mix in the yogurt and honey until the mixture is smooth and easy to spread.
- Detangle your hair gently with a wide-tooth comb before applying anything, since tangled hair is more prone to breakage during application.
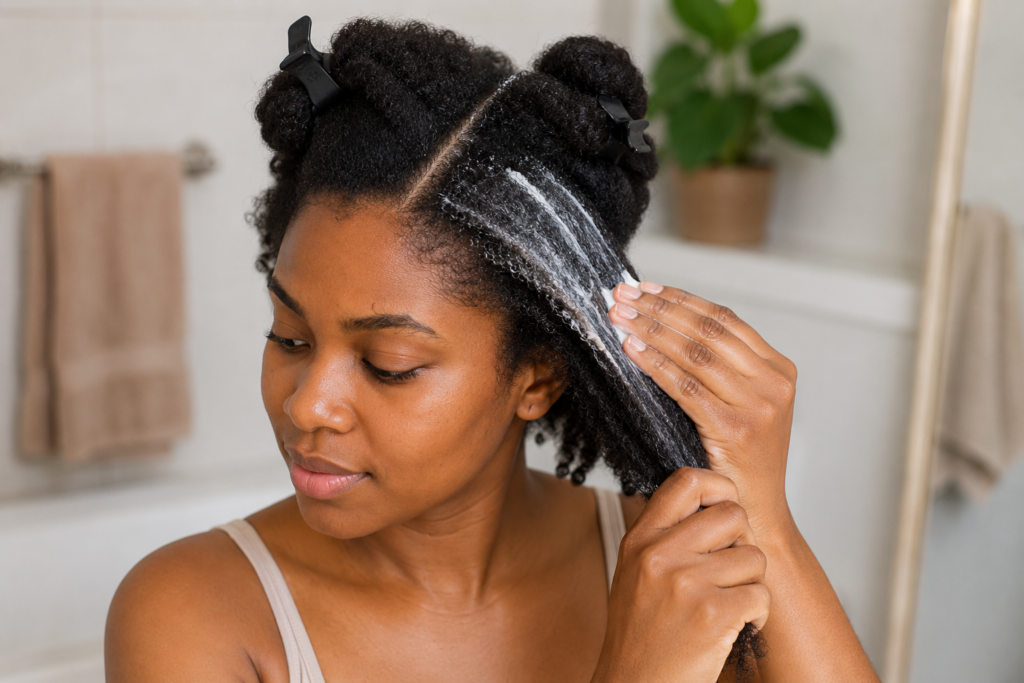
- Divide hair into four to six sections using clips to keep everything manageable.
- Apply the mixture evenly, section by section, focusing on mid-lengths and ends.
- Cover your hair with a shower cap or plastic cap.
- Leave it on for the recommended time for this recipe, generally 15 to 20 minutes.
- Rinse thoroughly with cool to lukewarm water.
- Follow immediately with a moisturizing conditioner.
To avoid unnecessary tangling, work in small sections and avoid piling wet, treated hair on top of your head while you finish applying to other sections.
How to Apply Protein Treatment to 4C Hair
Getting the application right matters as much as the recipe itself, especially for coily, tightly coiled strands.
Clean or damp hair: Apply the treatment to clean, damp hair rather than dry hair, since this allows more even distribution and better absorption.
Sectioning: Divide 4C hair into at least four sections. Smaller sections make it easier to coat each strand evenly without excessive finger detangling.
Distribution: Apply from mid-length to ends first, since this is usually where damage is most concentrated, then work any remaining product closer to the roots if needed.
Focus on damaged areas: If certain sections feel weaker or more damaged, such as ends that have been through more heat or color, you can apply slightly more product there.
Handle gently: 4C hair is more prone to breakage when handled roughly while wet. Use your fingers or a wide-tooth comb, and avoid pulling through knots.
Skip extra heat: Homemade protein treatments generally do not require added heat from a dryer or heating cap unless a specific recipe calls for it. Adding heat unnecessarily can also make the treatment feel stronger than intended.
How Long Should You Leave a Homemade Protein Treatment on 4C Hair?
Timing depends on the specific recipe and the strength of the protein source used. For a mild recipe like the one above, 15 to 20 minutes is generally enough.
Homemade mixtures should not be left on overnight unless there is a clear, specific reason for that particular recipe. Leaving a treatment on for hours does not make it more effective, and it increases the chance of the product drying out on your hair or feeling difficult to rinse.
Longer does not automatically mean better. Once the recommended time has passed, rinsing on schedule is the safer choice.
What to Do After a Protein Treatment
- Rinse thoroughly with cool to lukewarm water until no residue remains
- Follow with a moisturizing or deep conditioner to help balance the strengthening effect
- Detangle gently, ideally after conditioner has been applied for extra slip
- Use a leave-in conditioner if that is already part of your regular routine
- Seal and style as usual, following your normal regimen
- Avoid immediately repeating another protein treatment, even if hair feels great right after
How Often Should You Use a Protein Treatment on 4C Hair?
There is no single universal frequency that works for everyone. How often to do a protein treatment on 4C hair depends on:
- Current hair condition
- Whether hair is chemically treated
- How much heat styling is used
- How much breakage is happening
- The rest of your product routine
- How your hair actually feels after each treatment
A conservative starting point for beginners is once every four to six weeks, adjusting based on how your hair responds. If your hair feels stronger and more balanced afterward, that frequency is likely working. If it starts to feel stiff, dry, or difficult to manage, it’s a sign to slow down.
Protein Overload: What It Looks Like
“Protein overload” is a term commonly used in natural hair care to describe hair that has received more protein than it can currently handle. It is not a formal medical diagnosis, but a practical pattern many naturals recognize.
Common signs include:
- Hair that feels dry or rough despite conditioning
- Noticeable stiffness that doesn’t soften with product
- A general lack of softness or flexibility
- Increased tangling
- Breakage that increases rather than improves
If this happens, a few adjustments generally help:
- Stop protein treatments temporarily, giving hair a break of several weeks
- Focus on moisturizing conditioning instead, using deep conditioners without added protein
- Handle hair gently during this recovery period to minimize further stress
- Reassess before reintroducing protein, watching closely for how hair responds
Protein Treatment vs Deep Conditioner
| Feature | Protein Treatment | Deep Conditioner |
|---|---|---|
| Main purpose | Temporarily strengthens weak or damaged areas of the strand | Adds moisture, softness, and flexibility |
| Best for | Hair that feels weak, overly elastic, or chemically damaged | Hair that feels dry, dull, or rigid |
| Frequency | Every four to six weeks for most routines, adjusted as needed | Can generally be used weekly or biweekly |
| Main result | Firmer, more reinforced strands | Softer, more pliable strands |
| Can it replace the other? | No, protein and moisture serve different purposes | No, deep conditioning does not replace strengthening when hair is genuinely weak |
These two treatments are not competitors. Many natural hair routines use both, with a protein treatment followed by deep conditioning to restore softness afterward.
Homemade Protein Treatment vs Store-Bought Treatment
| Factor | Homemade | Store-Bought |
|---|---|---|
| Cost | Generally lower, using pantry ingredients | Varies, often higher per use |
| Convenience | Requires mixing and prep time | Ready to use out of the container |
| Ingredient consistency | Varies batch to batch | Formulated for consistent results |
| Shelf life | Should be used fresh, not stored long-term | Longer shelf life with proper storage |
| Ease of use | Requires more hands-on effort | Simpler, follow the label instructions |
| Predictability | Less predictable strength | More predictable, tested protein levels |
| Suitability for severe damage | Better suited to mild to moderate concerns | Often better suited to more significant damage |
Homemade is not automatically better or worse than store-bought. A homemade hair protein treatment can be a genuinely useful, low-cost option for mild strengthening, while a store-bought option may be more reliable for hair that needs stronger, more consistent reinforcement.
Common Mistakes to Avoid
- Using too much protein relative to what your hair actually needs
- Treating hair too frequently, without giving it time to recover
- Leaving the mixture on too long, assuming it will work better
- Skipping conditioner afterward, which can leave hair feeling stiff
- Applying aggressively to tangled hair, increasing the risk of breakage
- Assuming all breakage means protein deficiency, when dryness is sometimes the real cause
- Using a recipe without adjusting for your own hair’s response
- Keeping homemade mixtures too long, since they are best used fresh rather than stored for future use
How to Tell If the Treatment Worked
Realistic signs that a homemade protein treatment for 4C hair has helped include:
- Hair feels noticeably stronger to the touch
- Less excessive stretching when wet
- Better manageability during detangling and styling
- Reduced breakage over the following days or weeks
- Hair feels balanced, not extremely hard or overly soft
A single treatment cannot permanently repair severely damaged hair. Consistent, balanced care over time, rather than one strong treatment, is what supports healthier-feeling hair long term.
Frequently Asked Questions
What is the best homemade protein treatment for 4C hair? There is no single best recipe, since hair responds differently to different ingredients. A simple gelatin-based treatment is a common, beginner-friendly starting point because gelatin is a reliable protein source.
How often should I do a protein treatment on 4C hair? A conservative starting point is every four to six weeks, adjusted based on how your hair feels afterward and how much chemical or heat damage it experiences.
Is egg good for a protein treatment for 4C hair? Egg is a commonly used natural protein source and can offer mild strengthening. It needs to be rinsed with cool water to avoid cooking in the hair, and should be avoided by anyone with an egg allergy.
How long should I leave a protein treatment on 4C hair? For most simple homemade recipes, 15 to 20 minutes is generally enough. Homemade mixtures should not be left on for hours or overnight without a specific reason.
Should I deep condition after a protein treatment? Yes, following a protein treatment with a moisturizing or deep conditioner helps restore softness and balance out the strengthening effect.
How do I know if my 4C hair needs protein? Signs like excessive breakage, unusual weakness, excessive stretching when wet, or recent chemical or heat damage can suggest protein may help. A small strand test is a safer way to check before treating your whole head.
Can protein treatments make 4C hair dry? Yes, using protein too often or in too high a concentration can leave hair feeling dry, stiff, or brittle. This is often referred to as protein overload.
What should I do if my hair feels hard after a protein treatment? Pause protein treatments and focus on moisturizing conditioning for a few weeks. Handle hair gently during this time and reassess before considering another protein treatment.
Final Thoughts
A homemade protein treatment for 4C hair can be a practical, low-cost way to support strands that feel weak, overly stretchy, or damaged from heat and chemical processing. The key is balance. Protein strengthens, moisture softens, and most healthy natural hair routines need both.
Pay close attention to how your own hair responds rather than following a fixed schedule blindly. Not every head of 4C hair needs frequent protein, and more is not always better. With a conservative, observant approach, a simple homemade treatment can be a genuinely useful part of a balanced natural hair routine.